Understanding Vapor Barrier Installation
What is a Vapor Barrier?
A vapor barrier is a material designed to prevent moisture from passing through walls, floors, and ceilings, particularly in basements and crawl spaces. Typically made of polyethylene or similar materials, vapor barriers are essential in protecting building structures from moisture-related issues such as mold growth, rot, and overall deterioration. When effectively installed, a vapor barrier acts as a shield, keeping the living environment dry while also contributing to energy efficiency by maintaining consistent indoor humidity levels.
Importance of Vapor Barrier Installation
The significance of Vapor Barrier Installation cannot be overstated. It plays a critical role in maintaining the integrity of a building. Without proper vapor barriers, moisture can seep into structural materials, leading to costly repairs and health hazards. Areas like crawl spaces, which are often prone to dampness, directly benefit from vapor barriers as they minimize the risk of mold spores and contaminants infiltrating the home. Furthermore, a well-installed vapor barrier can enhance energy efficiency, leading to lower energy bills by creating a more stable indoor climate.
Key Materials for Installation
Choosing the right materials for your vapor barrier installation is crucial. Common materials include:
- Polyethylene Sheets: The most widely used material, typically available in various thicknesses, providing effective moisture control.
- Spray Foam Insulation: A flexible option that can seal gaps and cracks while providing insulation.
- Reflective Foil: Useful in warmer climates, reflective foil can reduce heat transfer while also serving as a vapor barrier.
- Sealants and Caulks: Essential for sealing edges and seams to ensure the barrier’s integrity.
Preparing for Vapor Barrier Installation
Assessing Crawl Space Conditions
Before beginning the installation process, assess the conditions of your crawl space. Look for signs of moisture intrusion, such as dampness, standing water, or wood rot. It’s essential to address any existing moisture problems before installing a vapor barrier, as these issues can compromise the barrier’s effectiveness. Check for adequate drainage and ensure that your gutters, downspouts, and any grading around your foundation direct water away from the home.
Tools and Supplies Needed
A successful vapor barrier installation requires several essential tools and supplies. Gather the following items:
- Polyethylene or chosen vapor barrier material
- Utility knife or scissors
- Paint roller or large brush (for adhesive installations)
- Tape measure
- Stapler and staples (if using heavy-duty materials)
- Sealant for edges and seams
- Personal protective equipment (gloves, masks)
Safety Precautions to Consider
Safety should be a top priority during installation. Ensure to wear appropriate gear such as gloves and masks to protect against mold spores and dust. Ensure proper ventilation in the working area to minimize inhalation of harmful particles. Familiarize yourself with any potential hazards specific to your crawl space, including low ceilings or unstable supports.
Step-by-Step Guide to Vapor Barrier Installation
Preparing the Area
Begin by clearing the area of debris and ensuring the surface is clean and dry. Remove any old insulation or vapor barriers. If necessary, level uneven surfaces to create a flat foundation for the installation. Additionally, ensure all vents and openings leading to the outside are closed or sealed appropriately to maximize the barrier’s effectiveness.
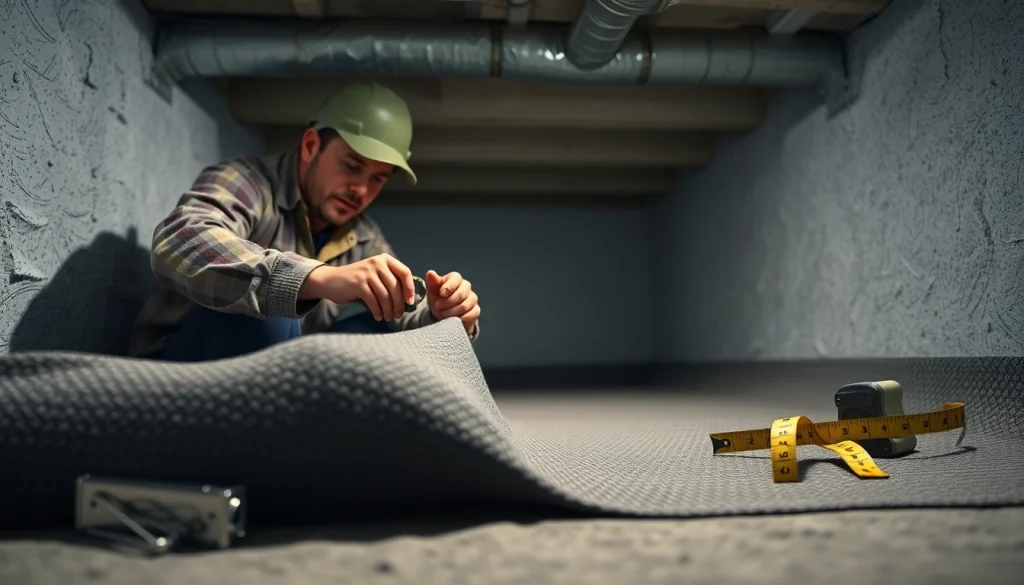
Installing the Vapor Barrier
Once the area is prepared, lay out the vapor barrier material across the ground, overlapping seams by at least 12 inches. Secure corners and edges using staples or adhesive tape. It’s essential to extend the barrier up the walls by at least a foot and seal this with caulk or suitable sealant to prevent moisture from traveling up and under the barrier.
Sealing and Testing the Installation
After installing the barrier, seal all seams and edges with appropriate tape or caulk. Conduct a thorough inspection to ensure all areas are adequately covered and sealed. It’s advisable to conduct a moisture test after installation to confirm that the area remains dry. You can do this by placing a few plastic sheets on various spots of the barrier, leaving them for 24 to 48 hours. If condensation forms, your installation needs further attention to seal gaps or address moisture sources.
Common Challenges in Vapor Barrier Installation
Dealing with Moisture Issues
While vapor barrier installation is effective, it may not eliminate moisture issues entirely. If there are persistent sources of moisture, consider methods such as dehumidification or improving drainage around your property. Regular inspections and maintenance will help identify any future problems and ensure the barrier’s integrity.
Addressing Uneven Surfaces
Uneven surfaces can complicate vapor barrier installation. Consider using thicker materials that can flex and adapt to minor surface imperfections. Alternatively, leveling the ground using sand or gravel can create a more uniform surface for installation.
Common Mistakes to Avoid
Some common mistakes during installation include inadequate sealing of seams or neglecting to address moisture sources prior to installation. Ensure that your vapor barrier is installed flat without wrinkles or folds, as these can create pathways for moisture. Additionally, avoid using thin or damaged materials that might compromise the barrier’s effectiveness.
Maintaining Your Vapor Barrier
Regular Inspection Guidelines
Regularly inspect your vapor barrier to ensure it remains intact and effective. Look for signs of wear, damage, or any gaps that may have developed over time. Ideally, conduct inspections at least twice a year or after significant weather events. If any issues are detected, take immediate corrective action.
Signs of Damage and Repair Strategies
Signs of damage can include visible tears or holes in the barrier, condensation formation, or signs of mold growth. Repair small tears with tape or additional poly sheeting; for larger issues, replacement of sections may be necessary. If significant moisture intrusion is detected, it may require a more thorough investigation into the source of the moisture.
Long-Term Benefits of Effective Installation
Properly installed vapor barriers offer a range of long-term benefits, including reducing mold growth risks, improving energy efficiency, and enhancing overall indoor air quality. They help prolong the lifespan of your building materials and systems, making your home safer and more comfortable in the long run.
Frequently Asked Questions
1. How often should I inspect my vapor barrier?
It’s recommended to inspect your vapor barrier at least twice a year, preferably in spring and fall, and after heavy rain or storms.
2. Can I install a vapor barrier myself?
Yes, with the right tools and materials, a DIY installation is feasible. Ensure to follow all steps for optimal effectiveness.
3. What thickness of vapor barrier is recommended?
A thickness of at least 6 mils is typically recommended for residential applications, providing effective moisture control.
4. Will a vapor barrier help with crawl space odors?
Yes, a vapor barrier can significantly reduce odors caused by moisture and mold, creating a fresher indoor environment.
5. Do I need to address drainage issues before installation?
Absolutely. Addressing drainage problems is critical to ensure the vapor barrier functions effectively and lasts longer.